Individual specimens are added to containers on the Storage page.
Before you begin
You must create the specimens on the Specimen Management page prior to adding them to a container. You must also have created the container to which the specimens will be added.
About this task
Individual specimens are stored in containers. You cannot add specimens to a level or
storage unit without a container.
Procedure
Click Storage > Stored Samples from the LDMS menu bar.
Find the storage container to which you want to add specimens in the storage tree.
Use the filters on the left side of the screen to assist in finding the container.
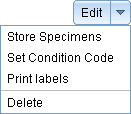
From the Edit menu to the right of the container, select Store specimens.
Figure: The Edit container menu
The Select Specimens window will open.
Do one of the following:
Use filters to find specimens to limit the specimens displayed at the bottom of the page
Click Upload File: Unique specimen IDs (file must be a text file
with one specimen ID per line)
Note: Supported ID formats include Specimen
IDs, Other Spec IDs, Global Spec IDs, and Database IDs.
Scan a specimen barcode
For each specimen to be stored, select the check box in the Selected column.
You can also click Select All to store all currently displayed specimens.
If you change filters at this point, any specimens selected will remain selected.
At the bottom of the Select Specimens window, click Continue.
The Select position for specimen window will open.
Select the position where the first specimen will be stored from either the Position box or the Preview image.
The global specimen ID for the specimen will be displayed in the window. Positions that are gray are not available because a specimen already occupies that location. A position that is black is an excluded position in the container’s configuration.
Optional: To place the remaining specimens to be stored automatically based on the container’s fill order setting, select the Auto-fill from selected position option.
Click Continue.
If there are more specimens to be stored and you did not select the Auto-fill from selected position option, you will be prompted to select a position for those specimens, otherwise, the window will close.
Results
The specimens are now stored. If you look at the storage tree, you will see that they are now listed under the specified container.
What to do next
Generate the Storage Details and Container reports. These will help you know where the specimens need to physically be stored.