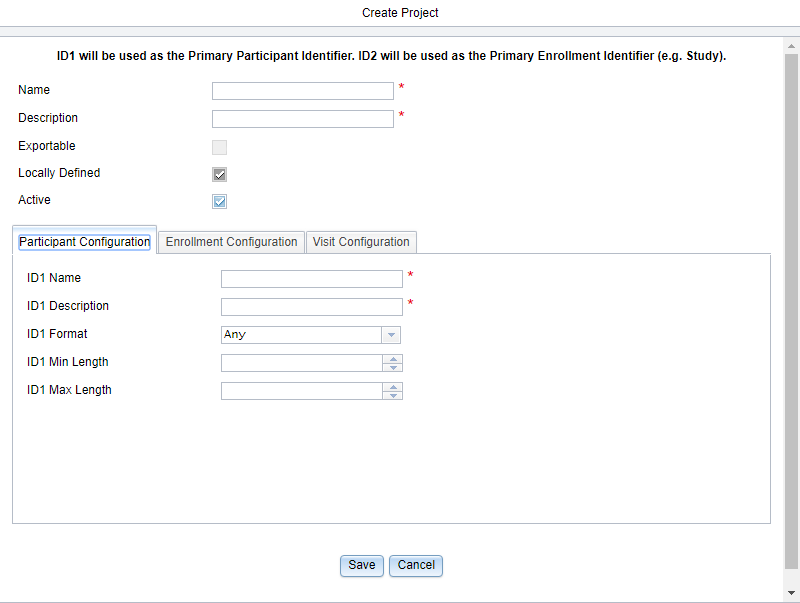
Creating a new project
New projects can be created on the Project Administration page.
Procedure
-
From the LDMS action menu, select Create Project.
The Create Project window will open.
Figure: The Create Project Window
-
Enter the name that you want to use for ID1 for the project into the ID1 Name box, and a brief
description into the ID1 Description box. The format and
acceptable values for ID1 may also be set.
ID1 is typically used as an identifier for a participant. For other types of work, such as quality control testing, ID1 could also be something else, like a testing panel number.
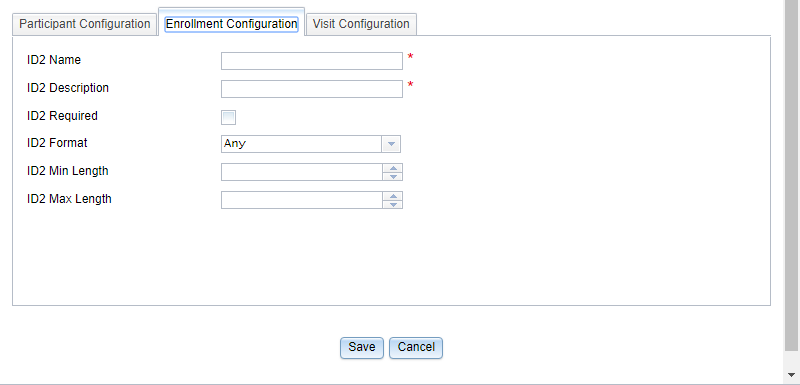
Figure: Enrollment Configuration
-
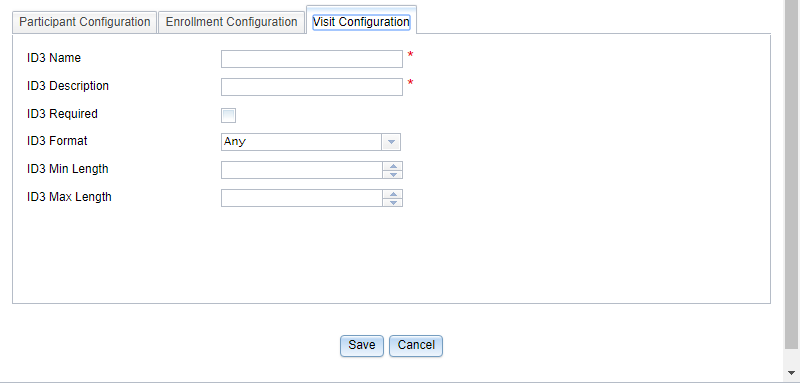
Enter the name that you want to use for ID2 into the
ID2 Name box, and a brief description into the
ID2 Description box. The format and acceptable values
for ID2 may also be set.
ID2 is typically used for a study or protocol identifying number.
Figure: Visit Configuration