Entering PK Test Results
Users can enter PK test results by navigating to the Test Results tab, clicking the Test Results module, selecting a test, and then clicking Edit.
Figure: Editing Test Results - General Tab. On the General Tab, the user must define some required information about the PK Test run, including (1) a Run Date, (2) Assay Name, (3) Run Type, and (4) Analytes. (5) The user may optionally add a Control Lot to a run.
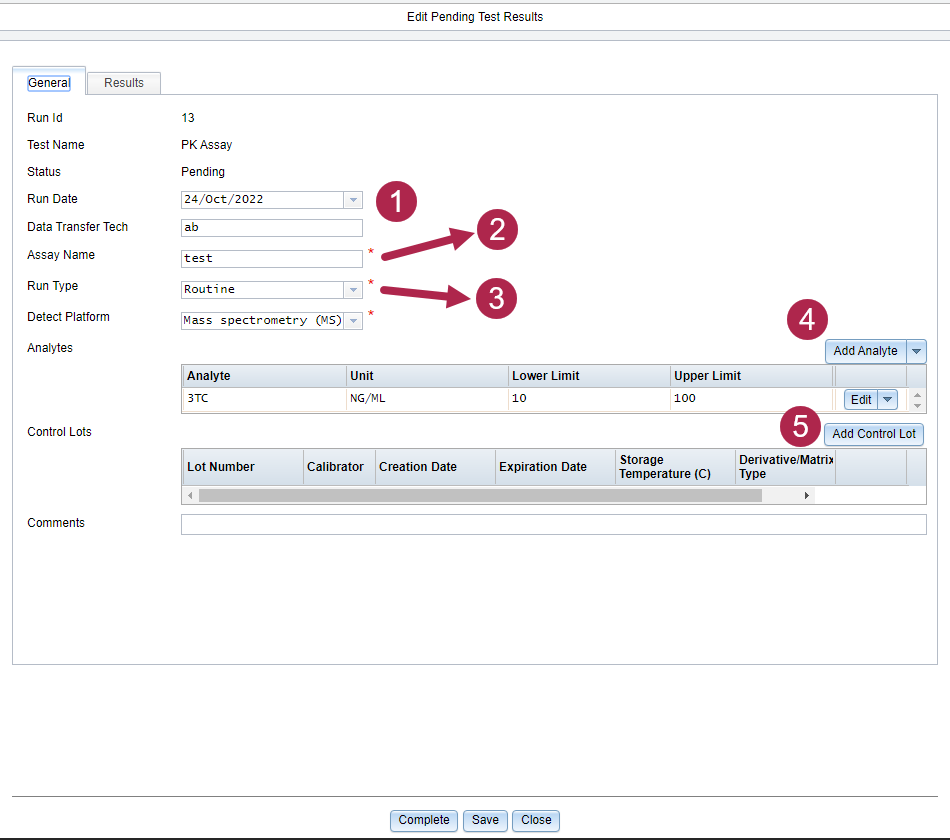
Assay Name: The Assay Name is a free entry field that the user can define. This name will be used to group assays together on certain reports and in the PK Control Charting Module.
Run Type: Certain Run Types are used for different scenarios. For example, Routine and Routine/Proficiency are used to report network results whereas Calibration and Stability may be used when validating a new method.
Add Analyte: When adding an analyte the user may choose to add these individually for each run or they can select an Analyte Setup that was previously defined in the PK Templates module.
Figure: Editing Test Results - Results Tab. On the Results Tab the user can (1) add individual controls, (2) add specimens, (3) change the result grid to allow editing of the limits for each individual item, (4) review, define, or edit the limits, target, or range of each control and specimen
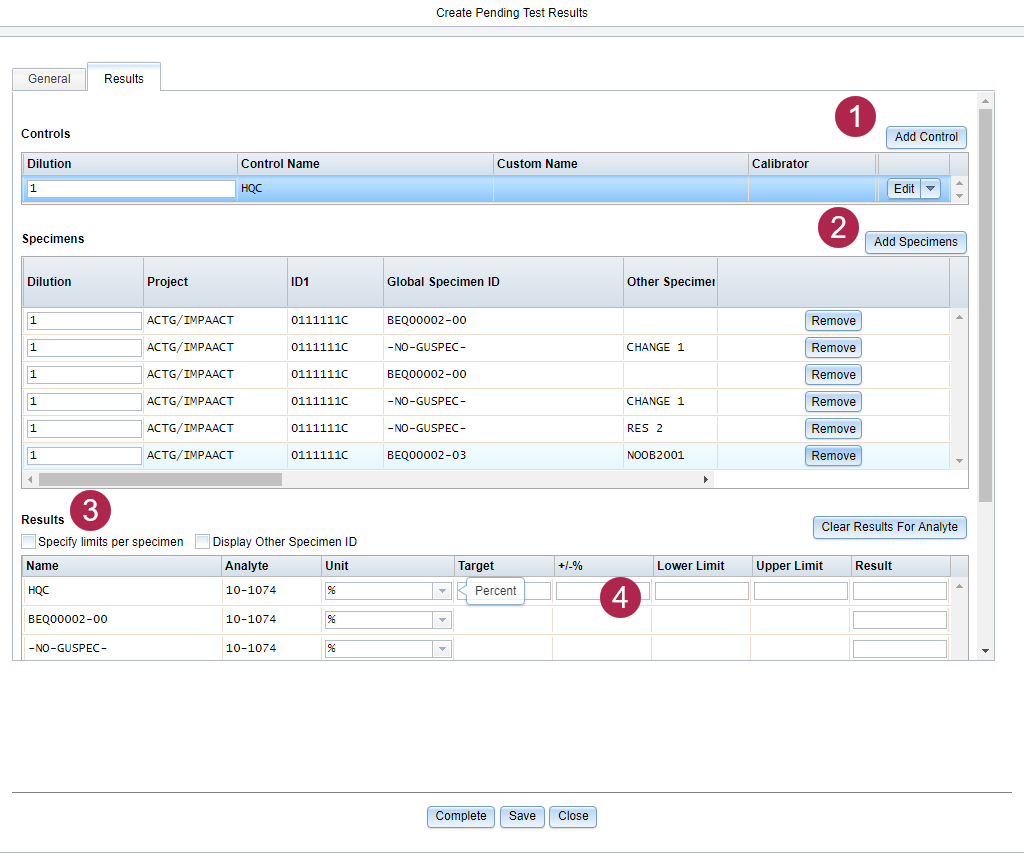
Add Control: The user can click Add Control to add additional controls to this run. Even if the user added a Control Lot on the general tab they can use this feature to include additional controls now.
Add Specimens: The user can choose to add specimens onto this run.
Specify Limits Per Specimen: If any specimen on the run needs to use a limit range other than what was defined at the analyte level this option can be used to change the limit for each individual specimen.
Setting Limits in the Result Grid: The user can set the Target and +/- for each control or they can set a specific Lower and Upper limit. If the user has checked to Specify Limits per Specimen they can also set the lower and upper limit for each specimen.
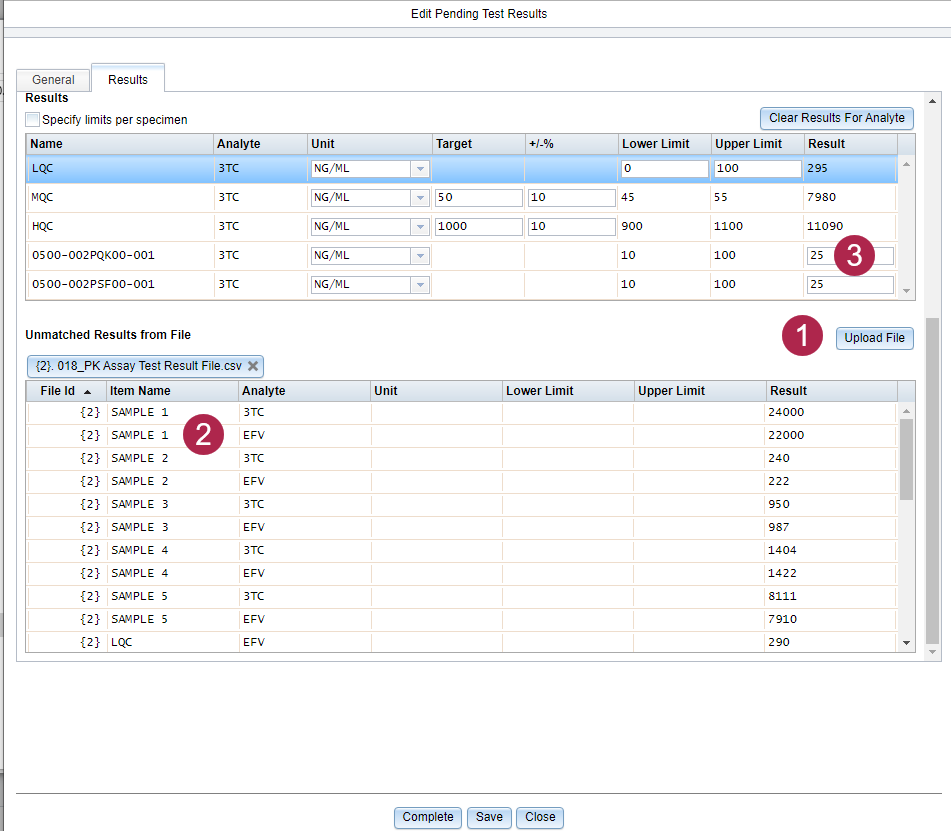
Figure: Editing Test Results - Results Tab (Continued). After the run setup is complete and results are available, the user can set these results on the Results tab by (1) uploading a file, (2) auto matching or drag and drop matching file results to the results grid, or (3) by skipping result file upload and manually setting results.
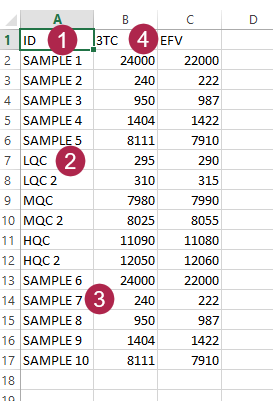
Upload File: An example PK assay test result file is shown below.
Figure: Example PK Assay Test Result File. When uploading a result file the LDMS expects (1) a file that has a defined ID. The ID in the file will auto match to LDMS based on (2) the Control Name, (3) Global Specimen ID, Other specimen ID, or ID1 value. The LDMS also expects a result column named (4) as the Specific analyte being tested for.
Unmatched Results From File: Any result from the file that could not be automatically matched to an item on the run in LDMS will be available in this grid to drag-and-drop to match.
Manually Setting Results: If a file is not used or if the LDMS contains more results than are found in the result file, the user can manually enter results to LDMS by typing directly into the field.